PluginChatBot User Manual: Set Up and Install Your AI Chatbot
Build and Add an AI Chatbot to Your Website in Just 2 Minutes
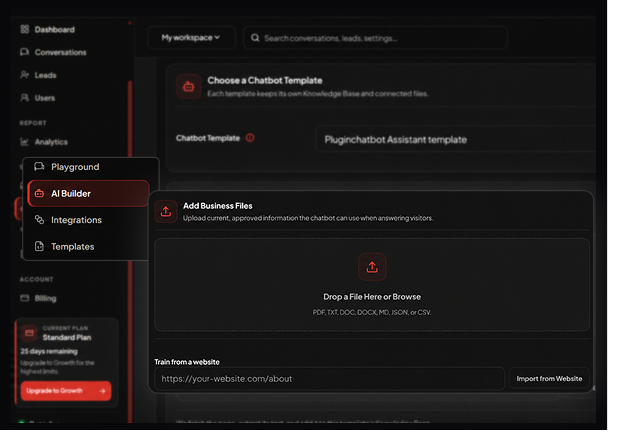
PluginChatBot lets you build and manage an AI chatbot without coding skills. It can answer common customer questions, capture leads, and provide round-the-clock support, giving your team more time to handle enquiries that need personal assistance.
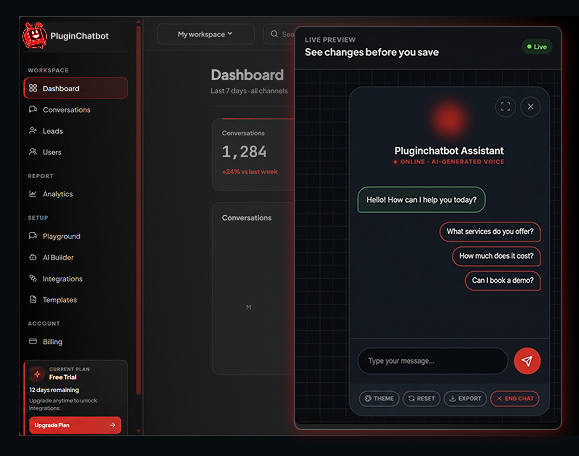








Deliver Customer Support With Customisable AI
How to Set Up PluginChatBot
- A PluginChatBot account
- An OpenAI API key
- Your business information, such as FAQs, services, products, pricing, and policies
- Access to your website's admin panel or source code
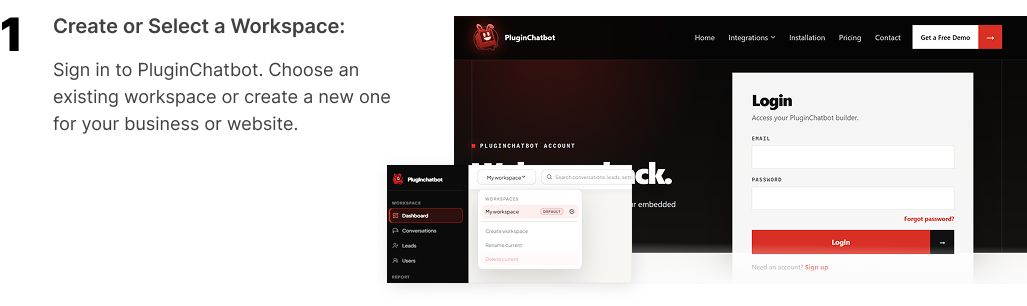
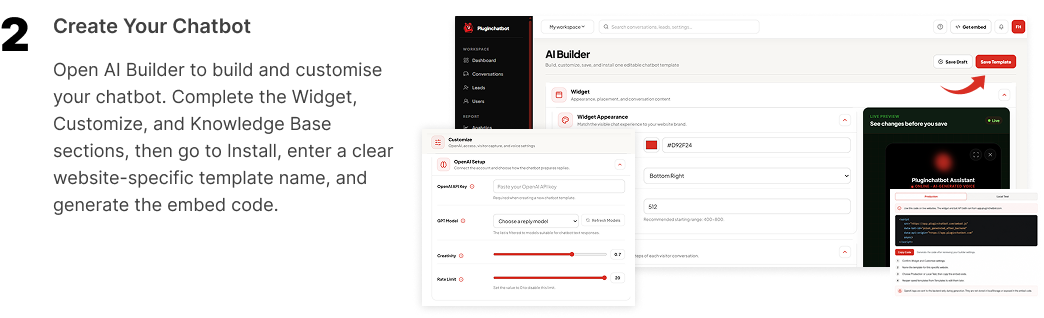
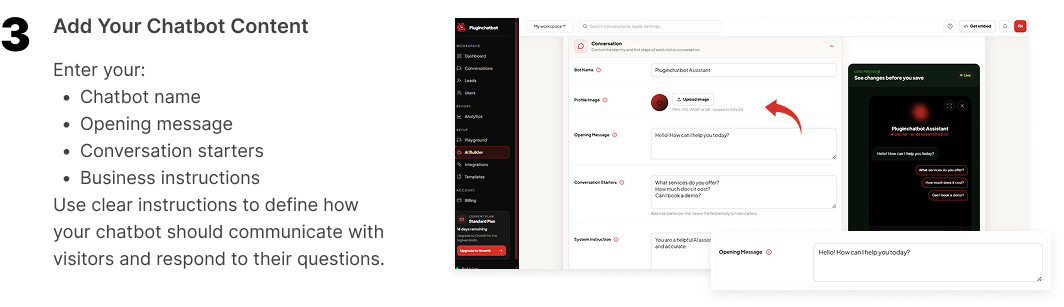
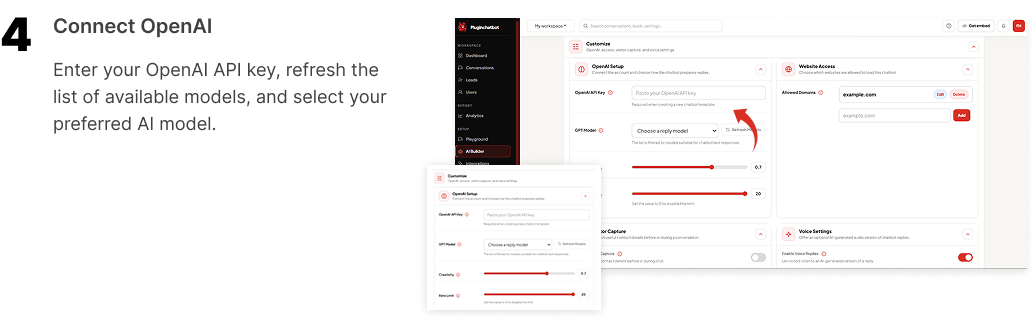
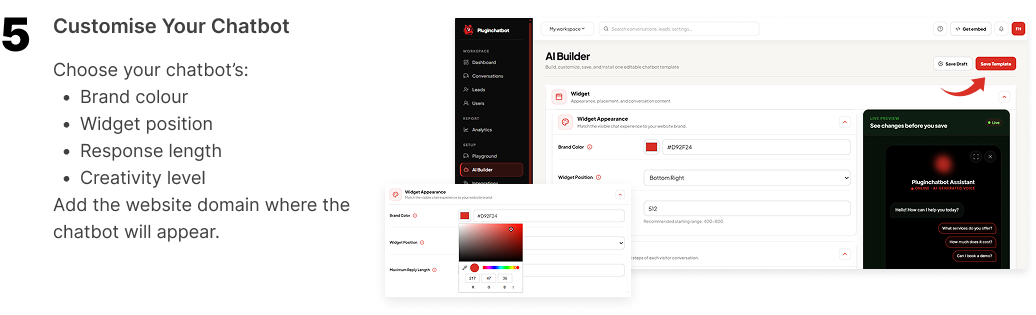
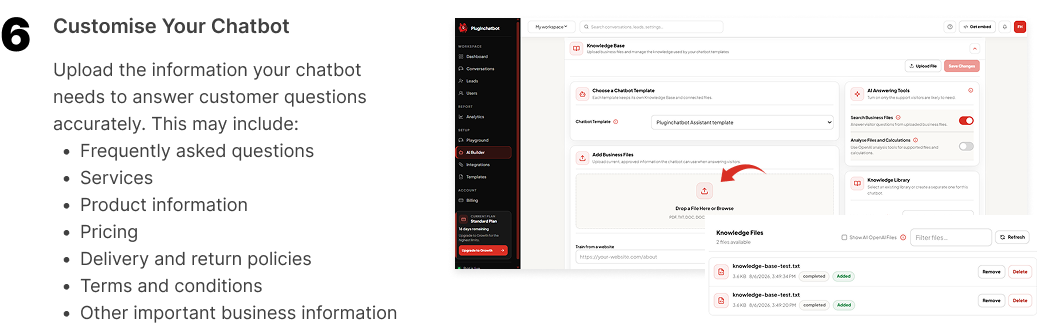
Connect Your Website in 3 Steps
Install PluginChatBot on Your Website
Adding your chatbot takes only a few minutes. Copy one embed snippet, paste it into your website, and publish your changes. Get your unique snippet from the PluginChatBot dashboard after creating your chatbot — it will already contain your chatbot's unique bot ID.
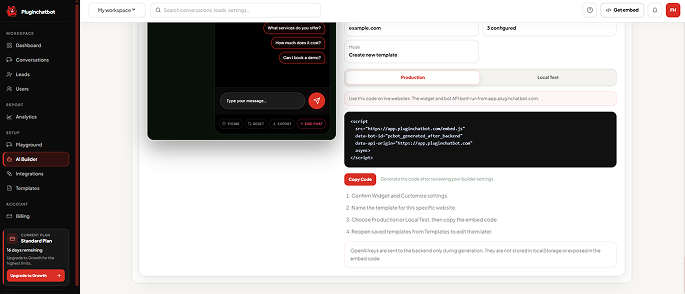
- Create your chatbot and copy its embed snippet from the dashboard.
- Paste the snippet into your website just before the closing
</body>tag. - Save or publish your changes, then refresh your website.
The chat widget should appear in the corner of your website.
Platform Installation Guides
How to install PluginChatBot on WordPress
- Install a header and footer code plugin, such as WPCode or Insert Headers and Footers.
- Open the plugin's footer or Before
</body>section. - Paste your PluginChatBot snippet.
- Save your changes.
- Visit and refresh your website to confirm that the chatbot appears on every page.
How to install PluginChatBot on WooCommerce
WooCommerce runs on WordPress, so follow the WordPress steps above. The chatbot then works across your shop, cart and product pages automatically.
How to install PluginChatBot on Shopify
- In your Shopify admin, go to Online Store → Themes → … → Edit code.
- Open
theme.liquidand paste the snippet just before</body>. - Save. The chatbot appears across your storefront.
How to install PluginChatBot on Wix
- In your Wix dashboard, go to Settings → Custom Code (under Advanced).
- Add new code, paste the snippet, set it to load on All pages, and choose Body – end.
- Apply, then publish your site.
How to install PluginChatBot on Webflow
- Open Project Settings → Custom Code.
- Paste the snippet into the Footer Code box.
- Save changes and publish your site.
How to install PluginChatBot on Squarespace
- Go to Settings → Advanced → Code Injection.
- Paste the snippet into the Footer box.
- Save. The chatbot appears across your site.
How to install PluginChatBot on a custom or hand-coded website
- Open your site's HTML file or page template.
- Paste the snippet just before
</body>. - Upload or deploy your site. Done.
Complete a final test
- Confirm the snippet is before
</body>and that you saved or published the change. - Refresh your website and check the widget appears in the corner.
- Send a test message and confirm the chatbot responds.
Widget troubleshooting
- Clear your site cache, plus any caching plugin or CDN.
- Check the
data-bot-idmatches your chatbot in the dashboard. - Confirm your website's domain is added to the chatbot's allowed domains in the dashboard.
 Do I need to know how to code?
No. You only need to copy your unique snippet and paste it into your website. Most website platforms provide a custom-code area, so you do not need to edit the site's code directly.
 Will PluginChatBot slow my website down?
No. The widget script loads asynchronously, so it does not block your pages from loading.
 Where can I find my embed snippet?
From your PluginChatBot dashboard after you create a chatbot. It already contains your unique bot ID.
 Can I install the same chatbot on multiple pages?
Yes. Add the snippet sitewide (for example in a footer or header area) and the chatbot appears on every page.
Update or Remove Your Chatbot from Your Website
To update your chatbot, open it in the PluginChatBot dashboard, make your changes, save them, and test the chatbot again. To remove the chatbot from your website, delete the embed snippet from the same footer, custom-code area, or template where it was installed. Save or publish your changes and clear your website cache if necessary.